PanoSnap Guide
How to Export an AI Chat as Text: Screenshot + OCR
To export an AI chat as copyable, editable text, the reliable route has two steps: capture the whole conversation as one high-resolution long screenshot with PanoSnap, then use OCR (text recognition) to pull the words out of the image. PanoSnap does not include OCR — recognition is handled by a separate tool. But it optimizes screenshots of AI chat pages: the image keeps the conversation title and automatically leaves out the input box, so only the conversation text remains. A clean image like that is exactly what makes OCR accurate.
Why copying an AI chat directly never gets everything
A long ChatGPT, Claude, or DeepSeek conversation looks easy to select and copy. In practice a few things get in the way:
- Not everything is there to copy. Chat pages use virtual scrolling: only messages near the viewport are rendered, and older ones appear only after you scroll up or click “load more”. Whatever has not loaded cannot be selected.
- Copying one message at a time is tedious. Many interfaces only let you copy a single message, so dozens of rounds mean dozens of copies, with gaps easy to miss.
- Formatting is lost. Formulas, tables, and code blocks often turn into garbled text or lose their indentation when pasted into a document.
- An export option may not exist. Some platforms have no “export as text”, and a PDF export is awkward to edit afterwards.
This guide focuses on turning the content into text — specifically, capture the whole conversation first so nothing is left out.
Two steps to export an AI chat as text
Step 1: Capture a high-resolution long screenshot
Open the conversation, scroll to the bottom and back to the top so every historical message has loaded, then click PanoSnap in the browser toolbar and choose “Full page screenshot”. The extension scrolls, shoots screen by screen, and stitches the result into one long image.
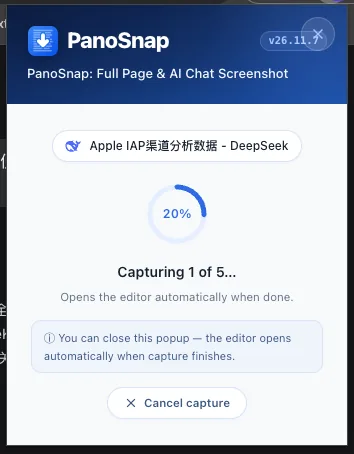
That pill at the top is worth noting: the conversation title is kept in the image, so when you save several chats you can still tell which image is which.
Step 2: Save as PNG, not JPG
The screenshot opens in the editor automatically, where you can crop, annotate, and redact. Export as PNG, not JPG: PNG is lossless and keeps the original pixels with crisp text edges, while JPG compression blurs small text and code and directly hurts recognition accuracy later. You can also export a PDF for sharing or archiving.
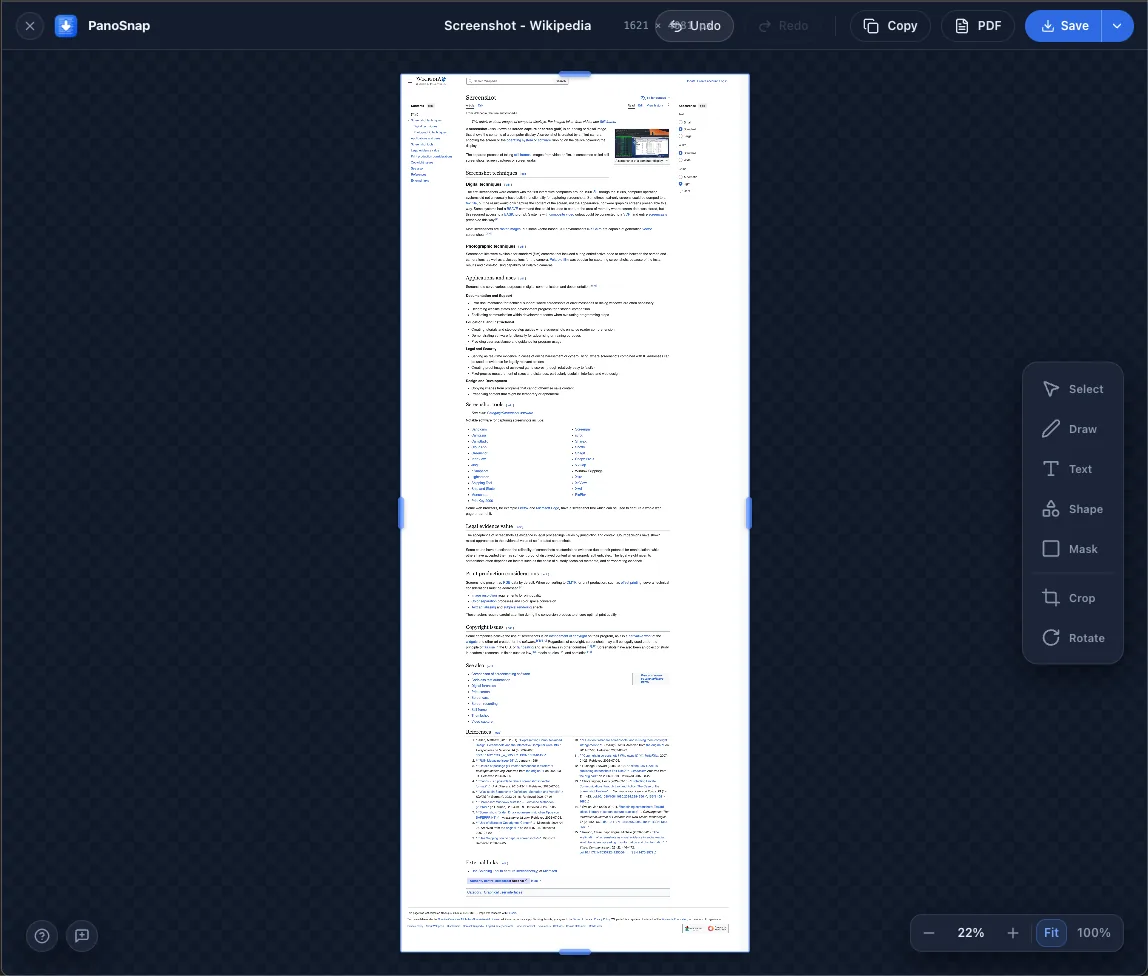
If the image contains account names, API keys, or internal information, cover them with the Mask tool first — before you send the image anywhere or run it through a recognition service.
Step 3: Turn the image into text with OCR
Hand the high-resolution image to any text-recognition tool, copy out the text, and paste it into a document, note, or codebase. At that point the content is editable, searchable, and translatable. Which tools to use, and the fastest one, is the next section.
In short: PanoSnap captures the whole conversation cleanly, OCR turns the image into text, and each step does one job.
Why PanoSnap images score so well with OCR
Recognition accuracy comes down to two things: how sharp the image is and how clean the layout is. PanoSnap’s optimization for AI chat pages covers both:
- The conversation title is kept, so a folder of saved chats stays organized and searchable.
- The input box is left out automatically — no composer, send button, or sidebar is captured. Only the conversation text remains.
- Clean means less noise. With no button labels, hints, or sidebar links mixed into the text, OCR will not treat them as content, and the result needs almost no cleanup.
- Full-resolution original. PNG export keeps every pixel, so small text, formulas, and code stay sharp.
The takeaway is simple: the cleaner and sharper the image, the higher the OCR accuracy. That is also why one clean screenshot beats repeatedly selecting and copying inside the chat window — you get everything at once, formatting intact.
If a particular page still leaves a strip of the composer in the image, crop it out in the editor.
Which tools turn an image into text?
PanoSnap has no built-in OCR, but there are plenty of ways to convert a clean long screenshot into text. Pick whichever fits.
WeChat on desktop: easiest, fast, and accurate
A practical trick that needs no extra software: send the image to WeChat and open it on a computer.
- Send the long image to WeChat (to yourself, or to “File Transfer”).
- Open the image in the desktop WeChat app and view it at full size.
- Select the text in the image and copy it, then paste it into your document.
Desktop WeChat lets you select and copy text inside an image directly, with high accuracy and very fast results — long images and Chinese text work especially well. If the conversation is sensitive, redact it first as described above.
macOS Preview: built in, nothing to install
On a Mac, opening the image in Preview gives you Live Text: you can select and copy the words in the image without installing anything or going online. The downside is that it can be slow, and accuracy on long images is less consistent — when you need the text quickly, the WeChat method is usually faster.
Other general options
- Dedicated OCR tools / online recognizers — good for batches, or when you want to preserve table structure.
- Vision-capable AI models — hand the image to a model and ask it to “transcribe this conversation”, or to organize it into Markdown, with a summary or translation on the side.
- Built-in system text extraction — the “copy text from image” feature in most photo viewers and screenshot previews works in a pinch.
| Method | Extra install | Speed | Recognition | Best for |
|---|---|---|---|---|
| Open in desktop WeChat and select | No (WeChat only) | Fast | High, strong on long Chinese images | Most people, one-off text |
| macOS Preview Live Text | No | Varies | Fair, weaker on long images | Mac users, no installs |
| Dedicated OCR tool | Yes | Medium | High, keeps structure | Batches, table-heavy pages |
| Vision-capable AI model | Depends | Medium | High, plus cleanup | Summaries, translation, Markdown |
For very long conversations (hundreds of turns), capture and recognize in segments: a few images of about 20 rounds each are safer than betting on one 20,000-pixel screenshot, and recognition is more accurate too. Always check formulas, code blocks, and complex tables against the original image before using the text.
FAQ
Does PanoSnap recognize text in images?
No. PanoSnap captures, annotates, redacts, and exports screenshots; it does not do OCR. Use a text-recognition tool for that. But because it optimizes AI chat screenshots — keeping the title, leaving out the input box, and exporting full-resolution images — its output is especially well suited to OCR.
How accurate is image-to-text recognition?
It depends on image quality. With a clean, full-resolution PNG, accuracy is very high; compressed, downscaled, or tiny text drops it noticeably. Exporting as PNG rather than JPG is the easiest way to get this right.
Does this work for ChatGPT, Claude, and DeepSeek chats?
Yes. Any conversation you can scroll through in a browser can be captured as a long image and then converted to text. The key is to load every historical message first — anything not rendered will not be captured, and therefore cannot be recognized.
What about very long conversations with hundreds of turns?
Capture and recognize in segments. The tool can produce very tall images, but one 20,000-pixel screenshot uses a lot of memory and is hard to recognize; splitting by rounds and numbering the files is safer and easier to organize.
Can I edit the recognized text?
Yes. OCR output is selectable text you can paste straight into a document, note, or codebase. Proofread formulas, code, and complex tables against the original image to catch the occasional misread character.
Summary
Exporting an AI chat as text = capture a clean, high-res long screenshot with the title kept and the input box left out, then turn the image into copyable text with OCR (or by selecting it in desktop WeChat). The cleaner and sharper the image, the more accurate the recognition. PanoSnap handles the first half — capturing cleanly — and your preferred tool handles the rest.
Browse all PanoSnap guides for capturing whole web pages and fixing repeated sticky headers in long screenshots.